Jak skonfigurować Google Analytics
Google Analytics służy do przeglądania i rozumienia ruchu w sieci.
Jest darmowy i łatwy w użyciu.
Możesz go dostosować do wielu przypadków użycia.
Działa po wyjęciu z pudełka.
Jest szybki w konfiguracji. Zdobądź swoje spostrzeżenia już dziś!
Stwórz moją darmową stronę ❯Pomiń czytanie o Google Analytics. Zabierz mnie bezpośrednio do pierwszego kroku. Przejdź do pierwszego kroku
Co to jest Google Analytics
Google Analytics to rozwiązanie do analityki internetowej.
Jest rozwijany i wspierany przez Google.
Najnowsza wersja nazywa się Google Analytics 4.
Może być używany do przeglądania danych, takich jak odbiorcy, odsłony stron, sesje, dane demograficzne i wydarzenia.
Dlaczego włączyć Google Analytics
Zrozum swój ruch w sieci, aby podejmować lepsze decyzje.
Zrozum i ulepsz lejek sprzedaży.
Ucz się eksperymentując (na przykład testy a/b).
Google ma inne rozwiązanie o nazwie Google Optimize. To rozwiązanie jest przeznaczone do testów.
Dla kogo jest Google Analytics
Google Analytics jest przydatny dla każdego, kto ma witrynę internetową.
Dostarcza informacji o tym, kto korzysta z Twojej witryny i jak wchodzi z nią w interakcję.
Ponadto interfejs jest łatwy do zrozumienia.
Nie potrzebujesz wiedzy analitycznej, aby korzystać z usługi i poruszać się po niej.
Jak skonfigurować Google Analytics krok po kroku
Google Analytics można skonfigurować na dwa sposoby : Globalny tag witryny (gtag.js) lub Menedżer tagów Google .
Najprostszym sposobem jest użycie tagu globalnej witryny.
W tym samouczku zostanie zastosowane podejście The Global Website Tag.
Przygotowania
Zdecyduj, którego edytora kodu użyć i skonfiguruj swoje środowisko.
W3Schools stworzył łatwy w użyciu edytor kodu o nazwie W3Schools Spaces . Zarejestruj się i rozpocznij za pomocą kilku kliknięć.
Zacznij za darmo ❯Utwórz plik index.html , aby móc wprowadzić kod.
Cała konfiguracja. Chodźmy!
Skonfiguruj Google Analytics: globalny tag witryny
Krok 1: Utwórz konto Google Analytics
Przejdź do Analytics: utwórz konto lub zaloguj się do Analytics
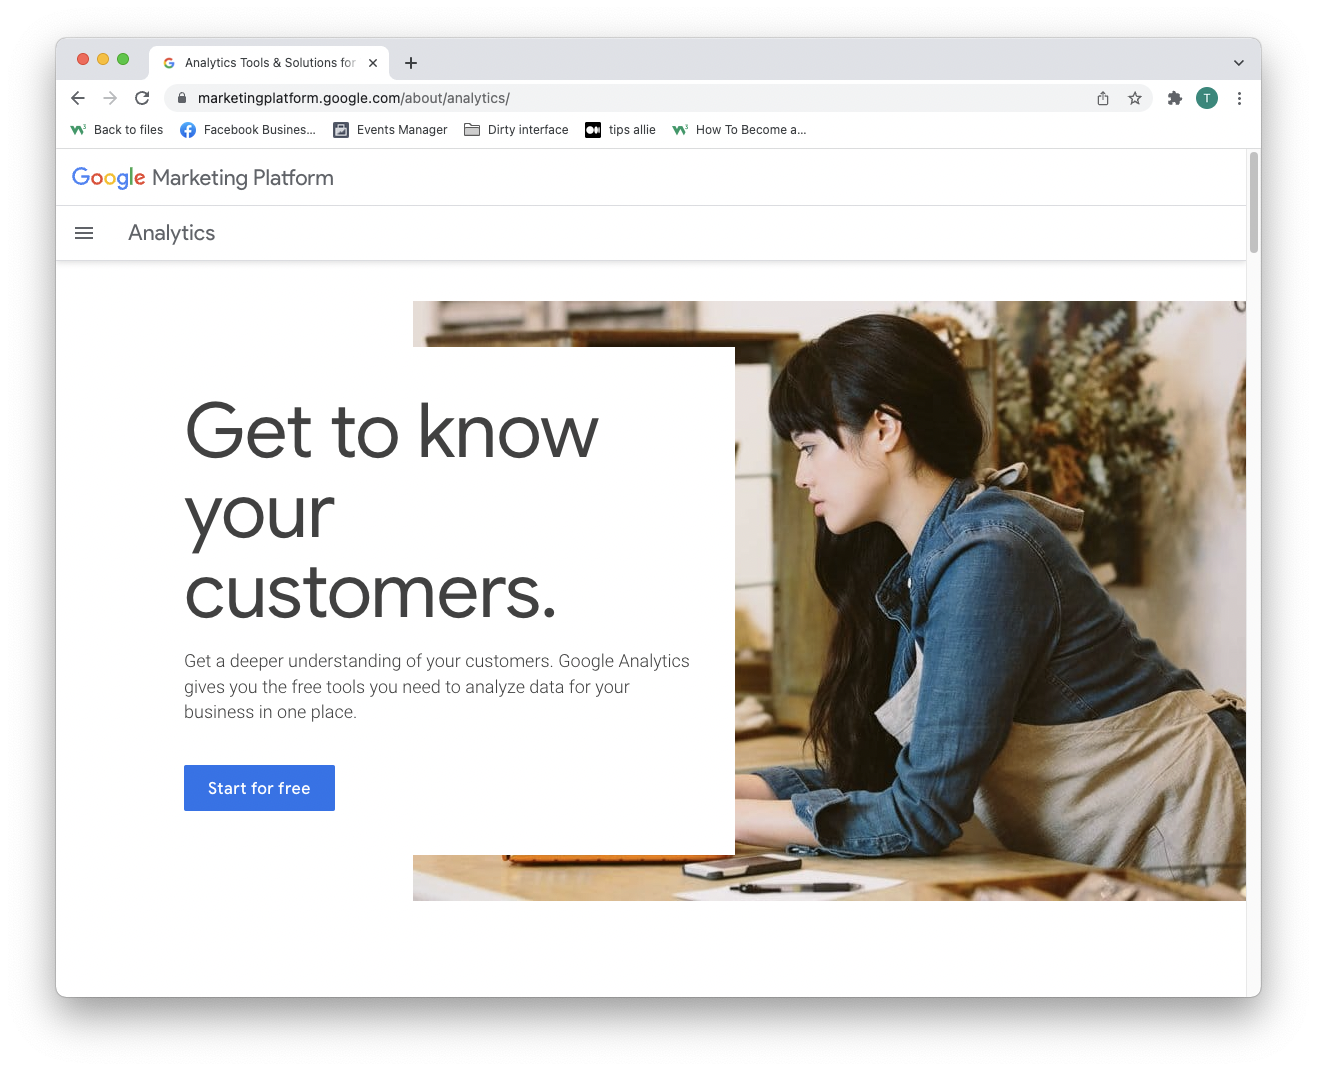
Link w powyższym akapicie prowadzi do strony docelowej Google Analytics.
Kliknij przycisk „Rozpocznij za darmo”.
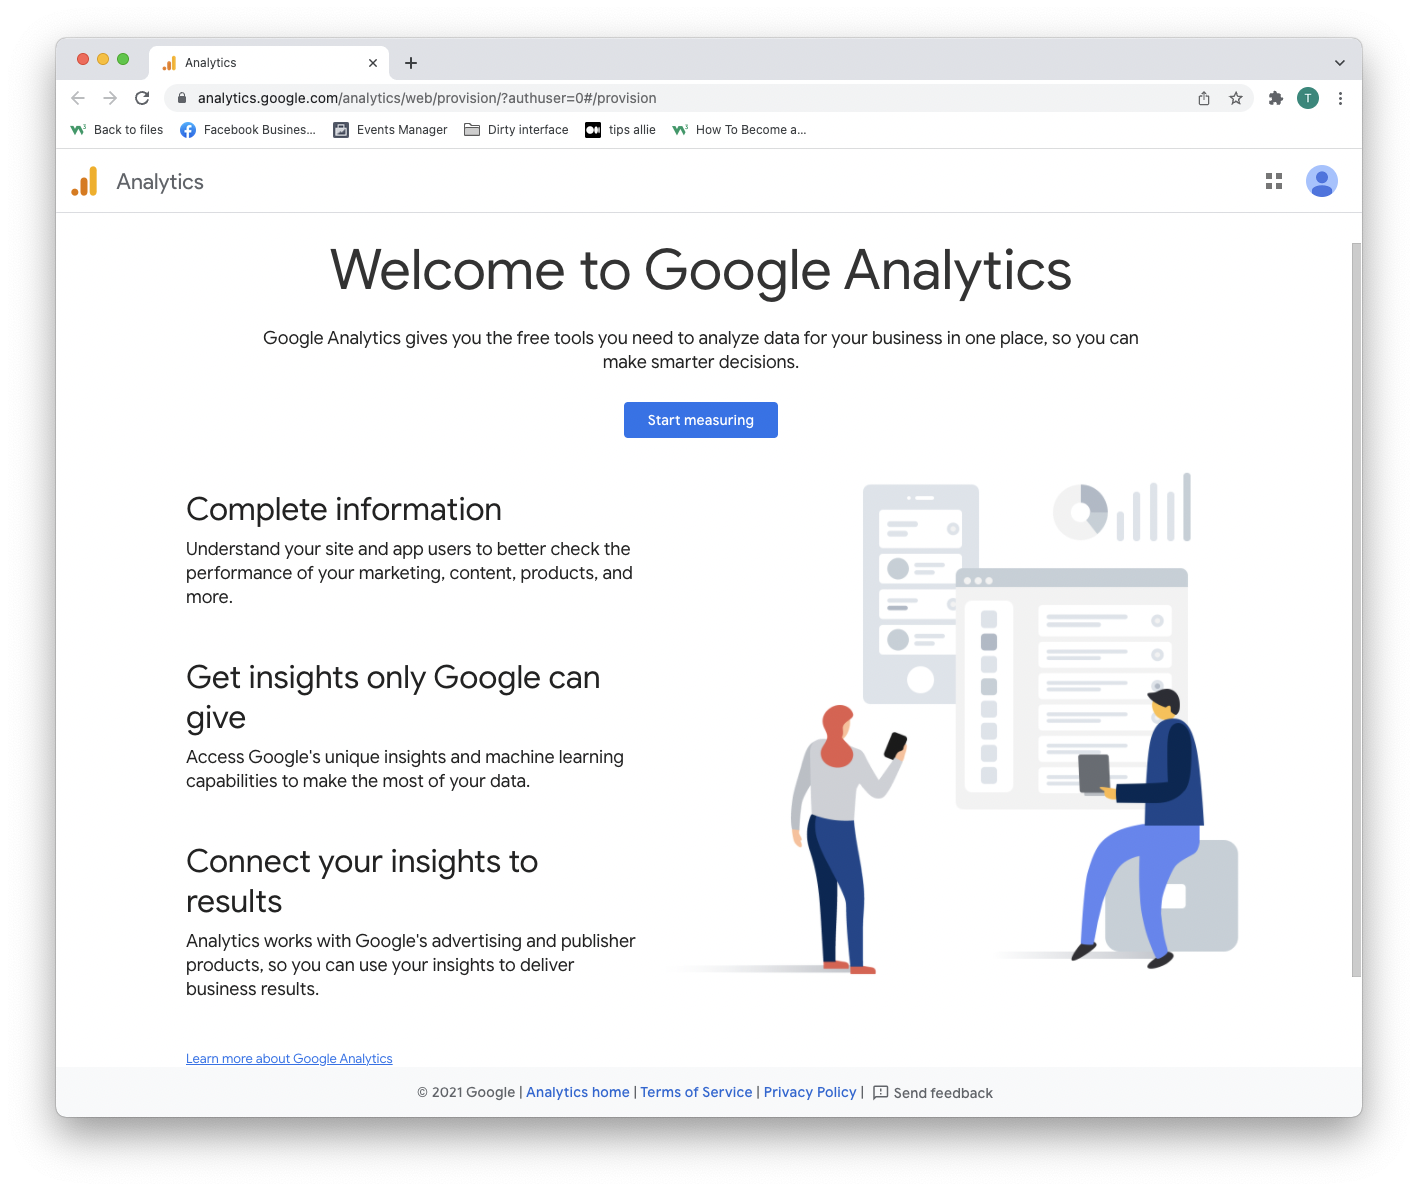
Krok 2: Wejdź na stronę powitalną
Po utworzeniu konta lub zalogowaniu się zapraszamy do rozwiązania.
Naciśnij przycisk „Rozpocznij pomiar”, aby kontynuować.
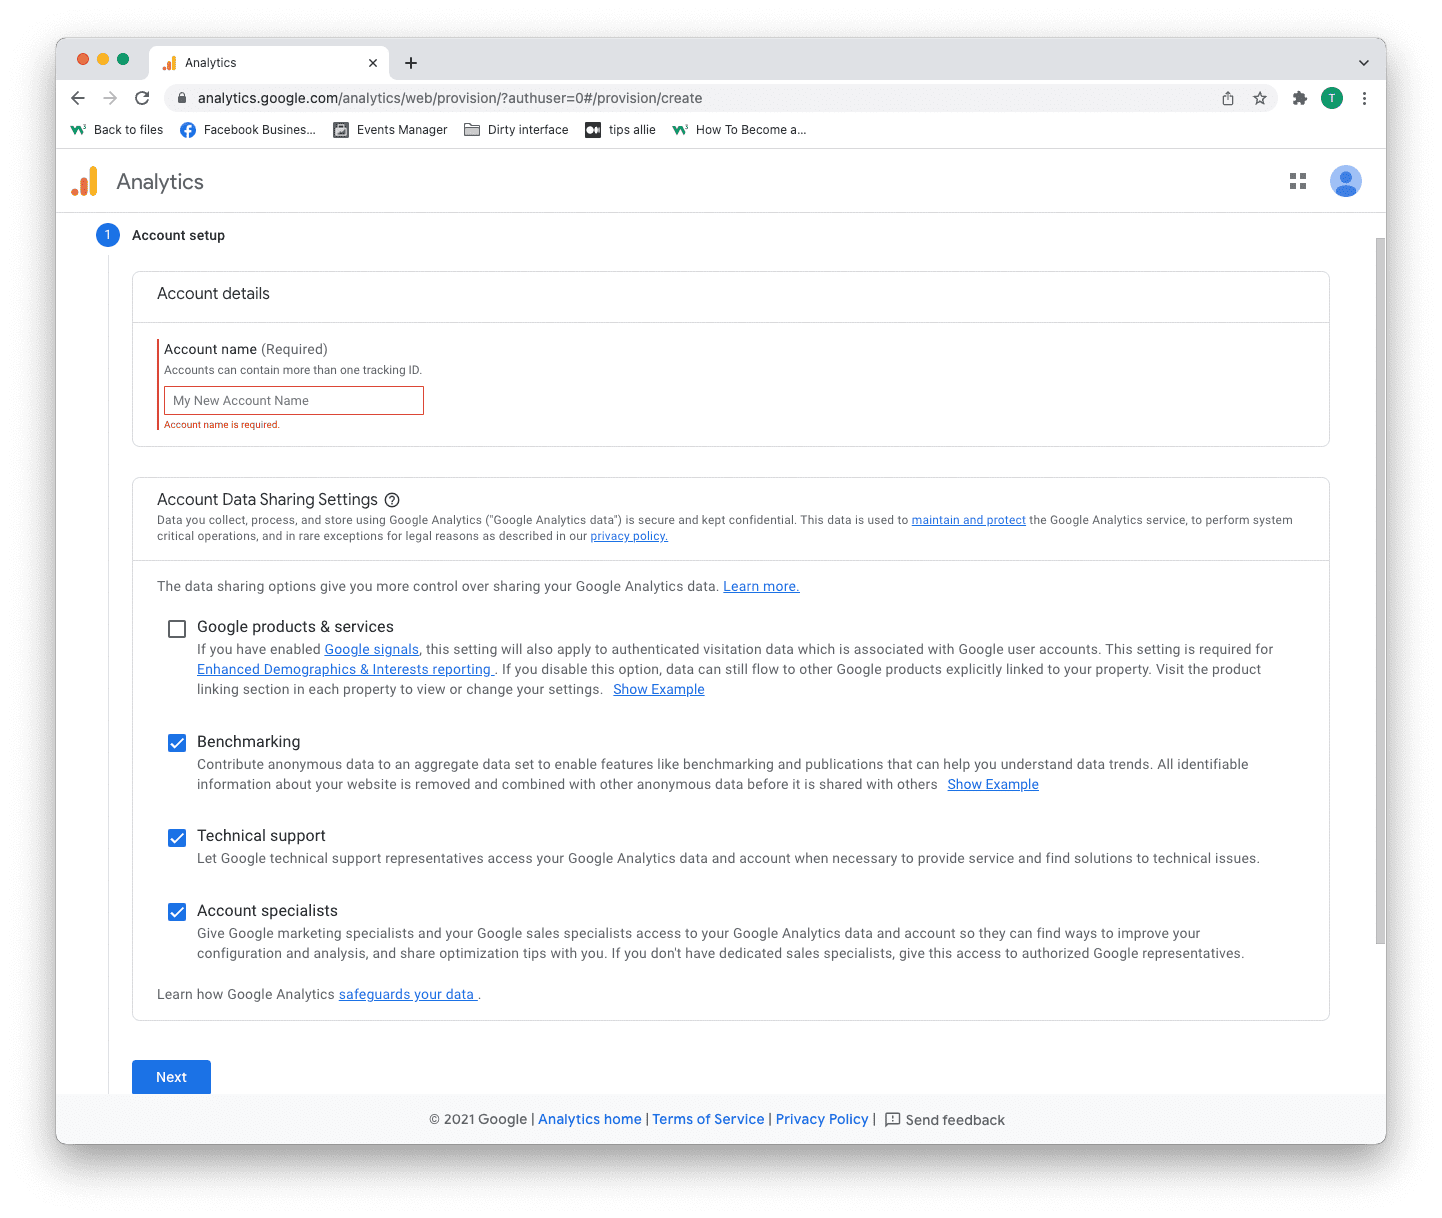
Krok 3: Konfiguracja konta
Masz tu do podjęcia dwie decyzje.
- Wpisz nazwę swojego konta.
- Zdecyduj, jakie dane chcesz udostępnić.
- Kliknij przycisk „Dalej”.
Jedno konto może mieć więcej niż jeden identyfikator śledzenia. Za pomocą konta możesz śledzić więcej niż jedną witrynę.
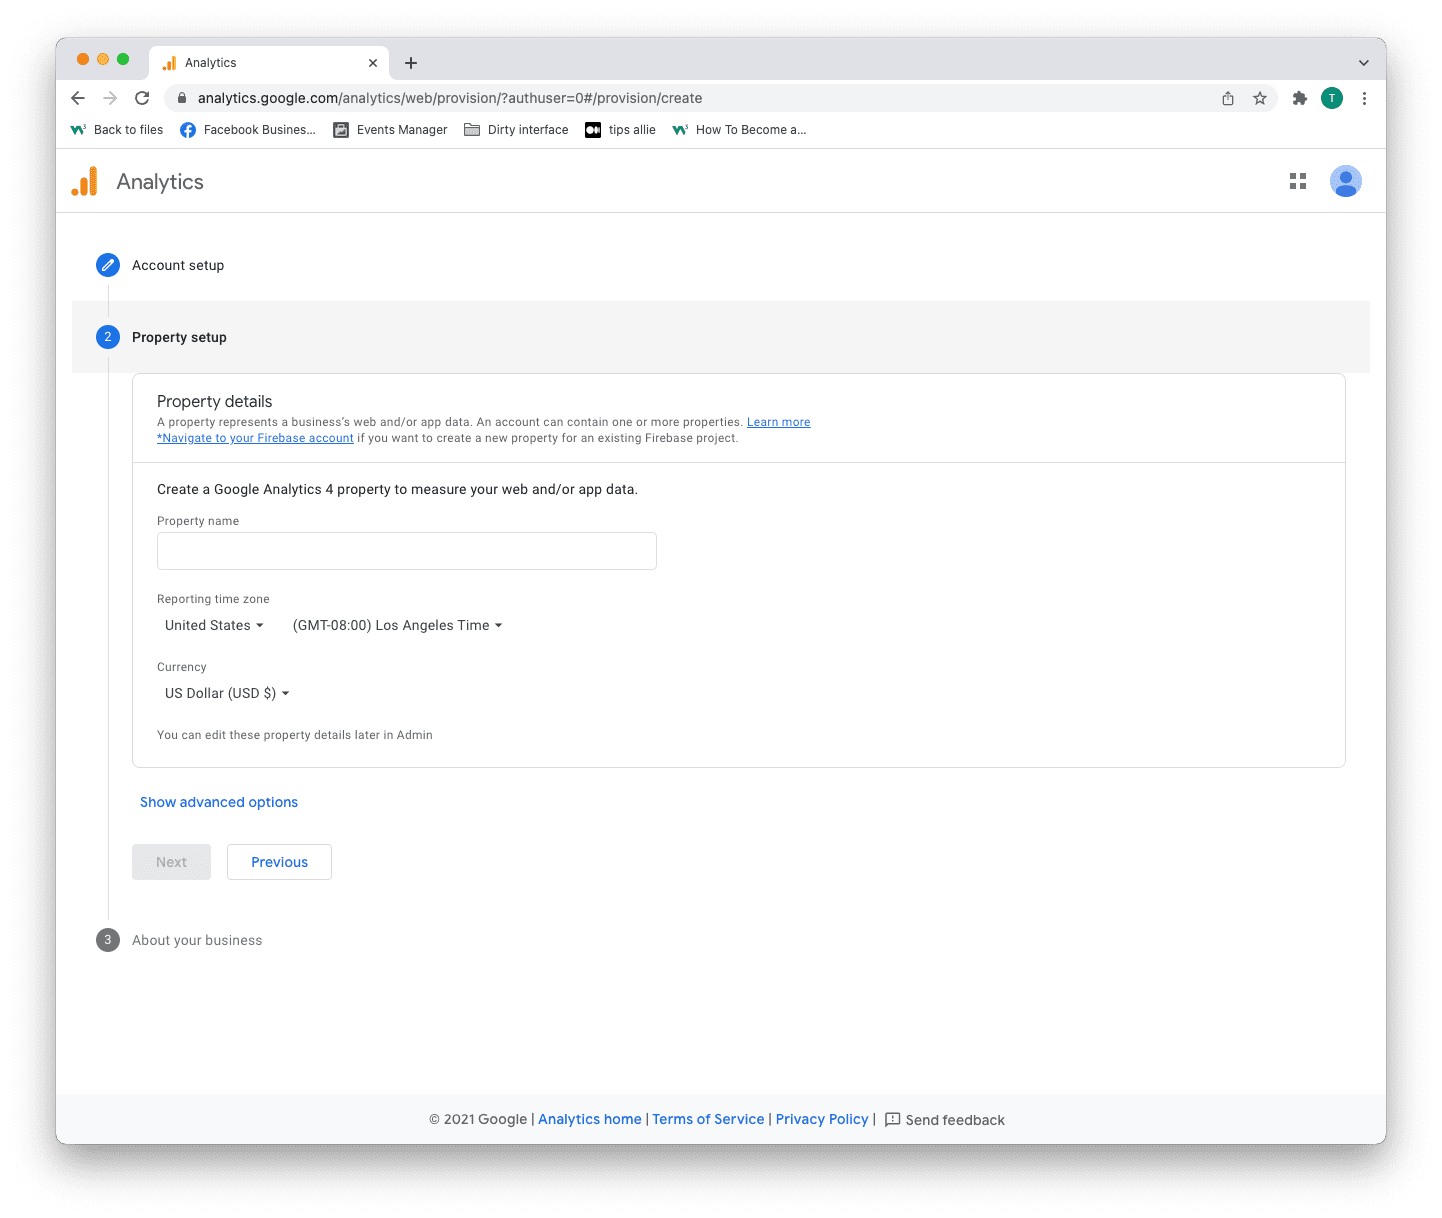
Krok 4: Konfiguracja nieruchomości
Właściwość to usługa, którą mierzysz, na przykład witryna internetowa, aplikacja, drzewo linków itp.
- Wpisz nazwę usługi.
- Wpisz swoją strefę czasową.
- Wprowadź walutę, której używasz.
- Kliknij przycisk „Dalej”.
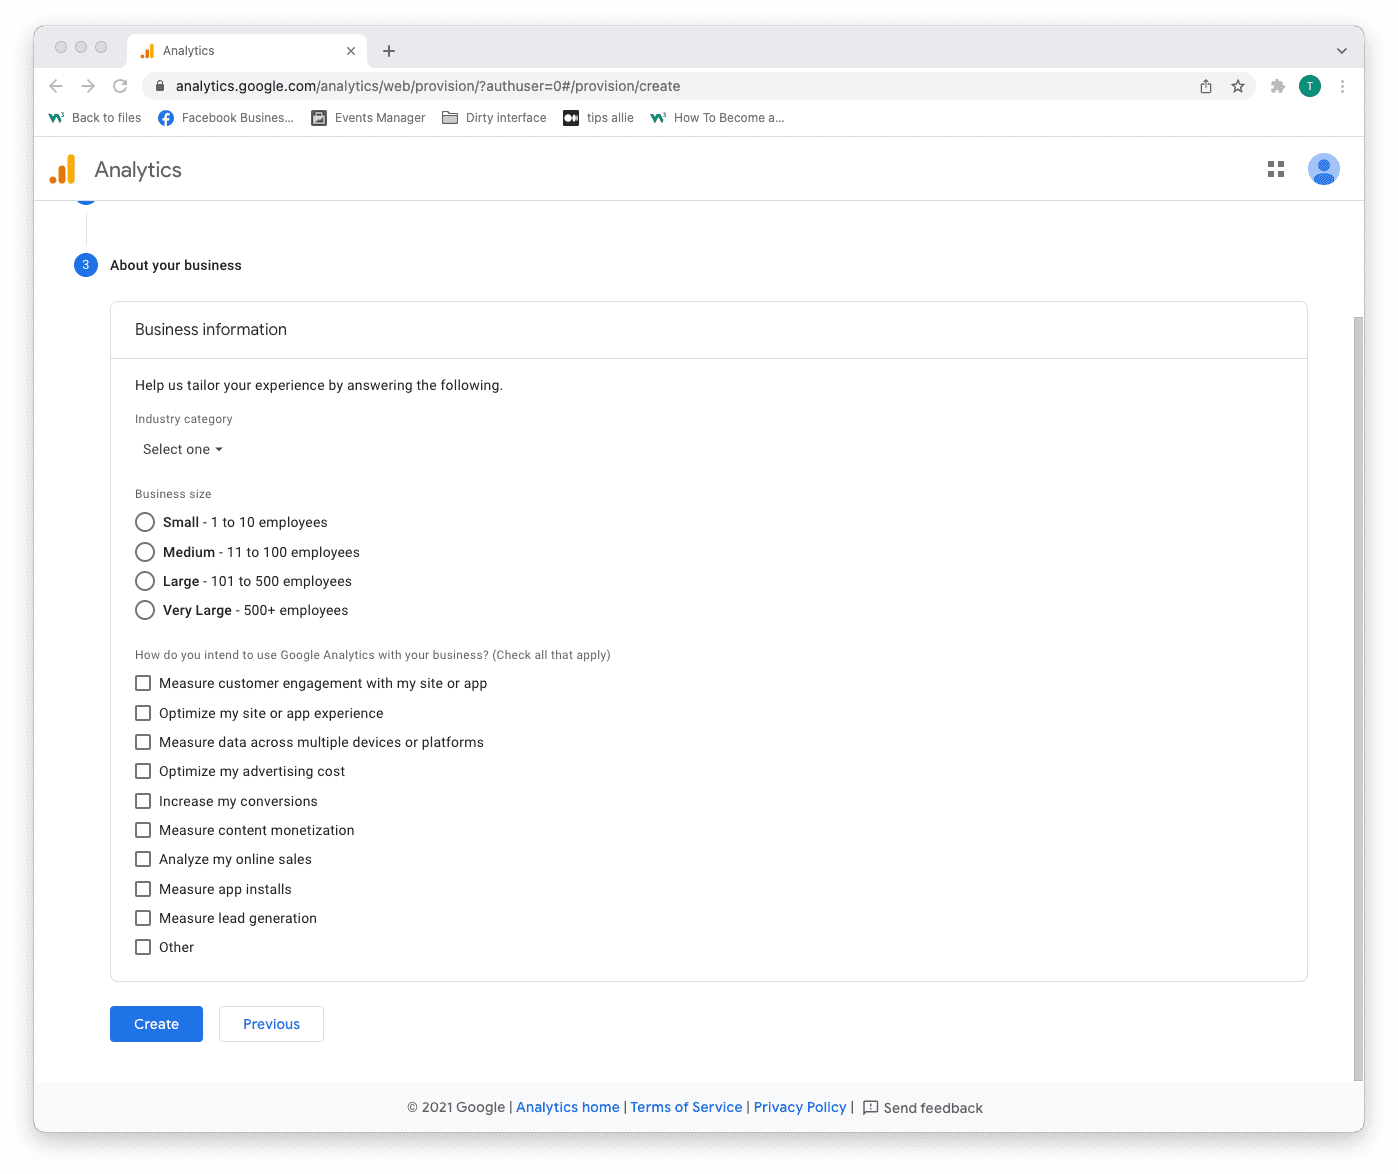
Krok 5: Dodaj informacje o firmie
Analytics wykorzystuje te informacje, aby dostosować Twoje wrażenia.
- Wybierz kategorię swojej branży.
- Wybierz rozmiar firmy.
- Tick the boxes for how you are planning to use Analytics.
- Click the "Create" button to proceed.
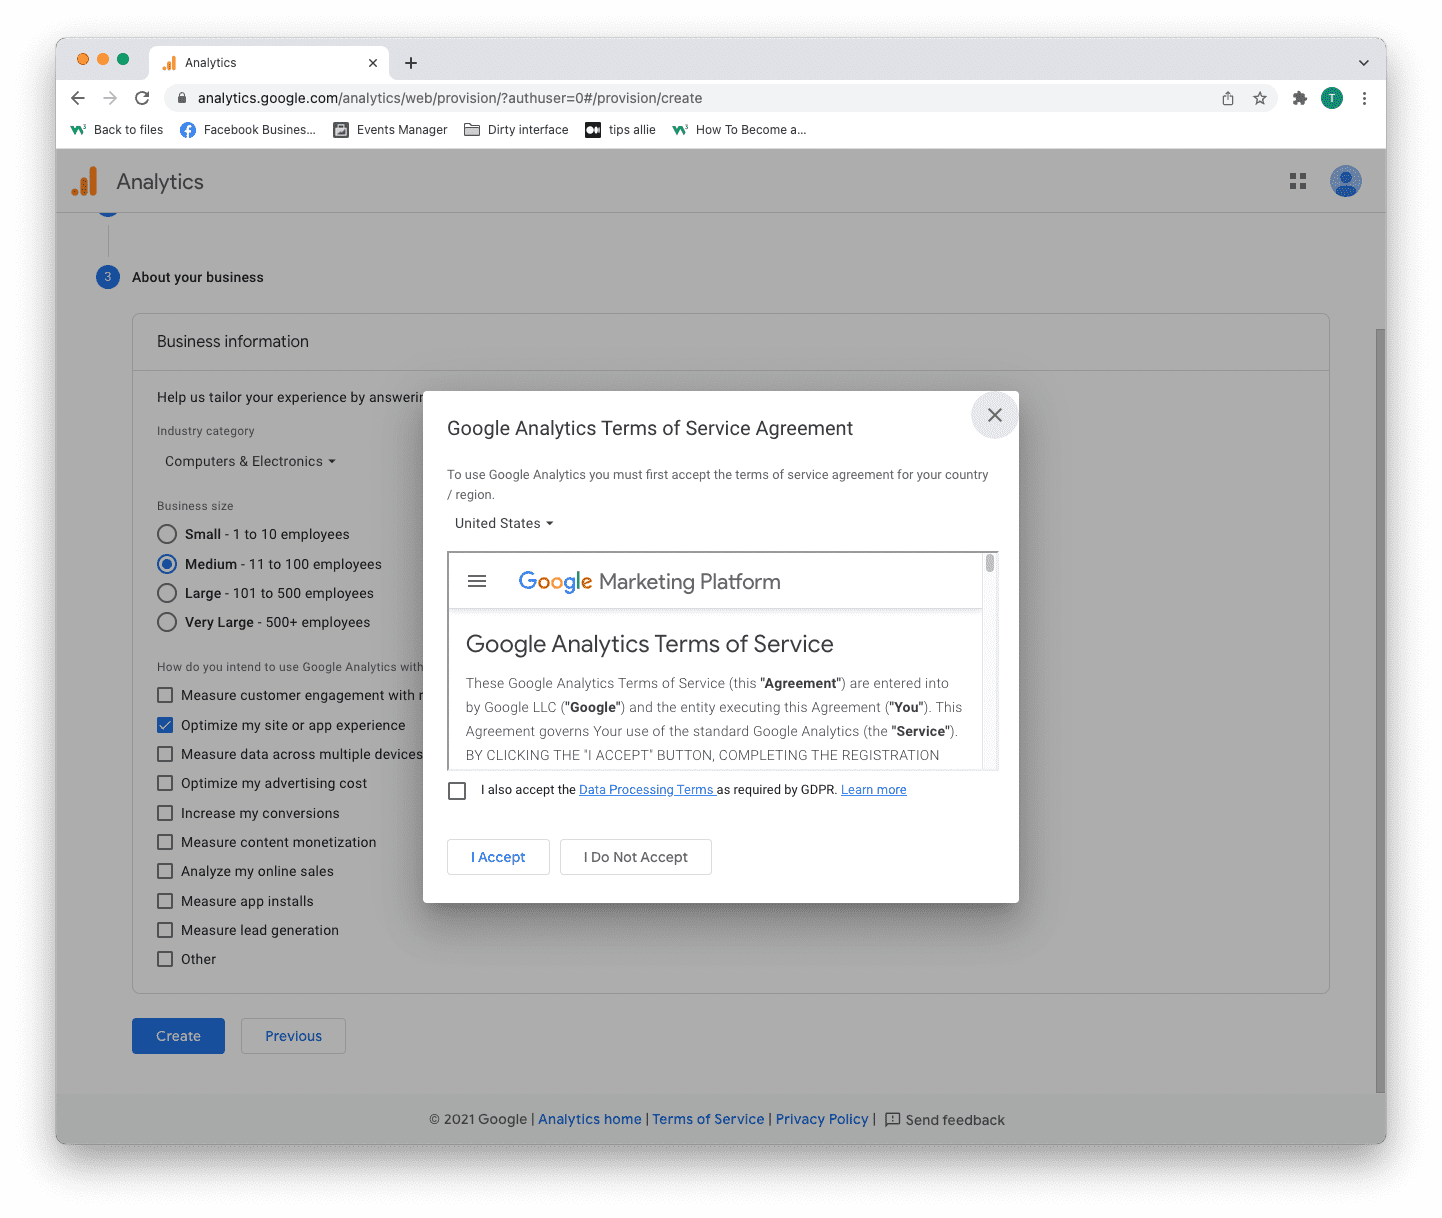
Step 6: Terms of Service Agreement
Read and understand the terms of service.
Tick the GDPR box and click the "I accept" button if you agree.
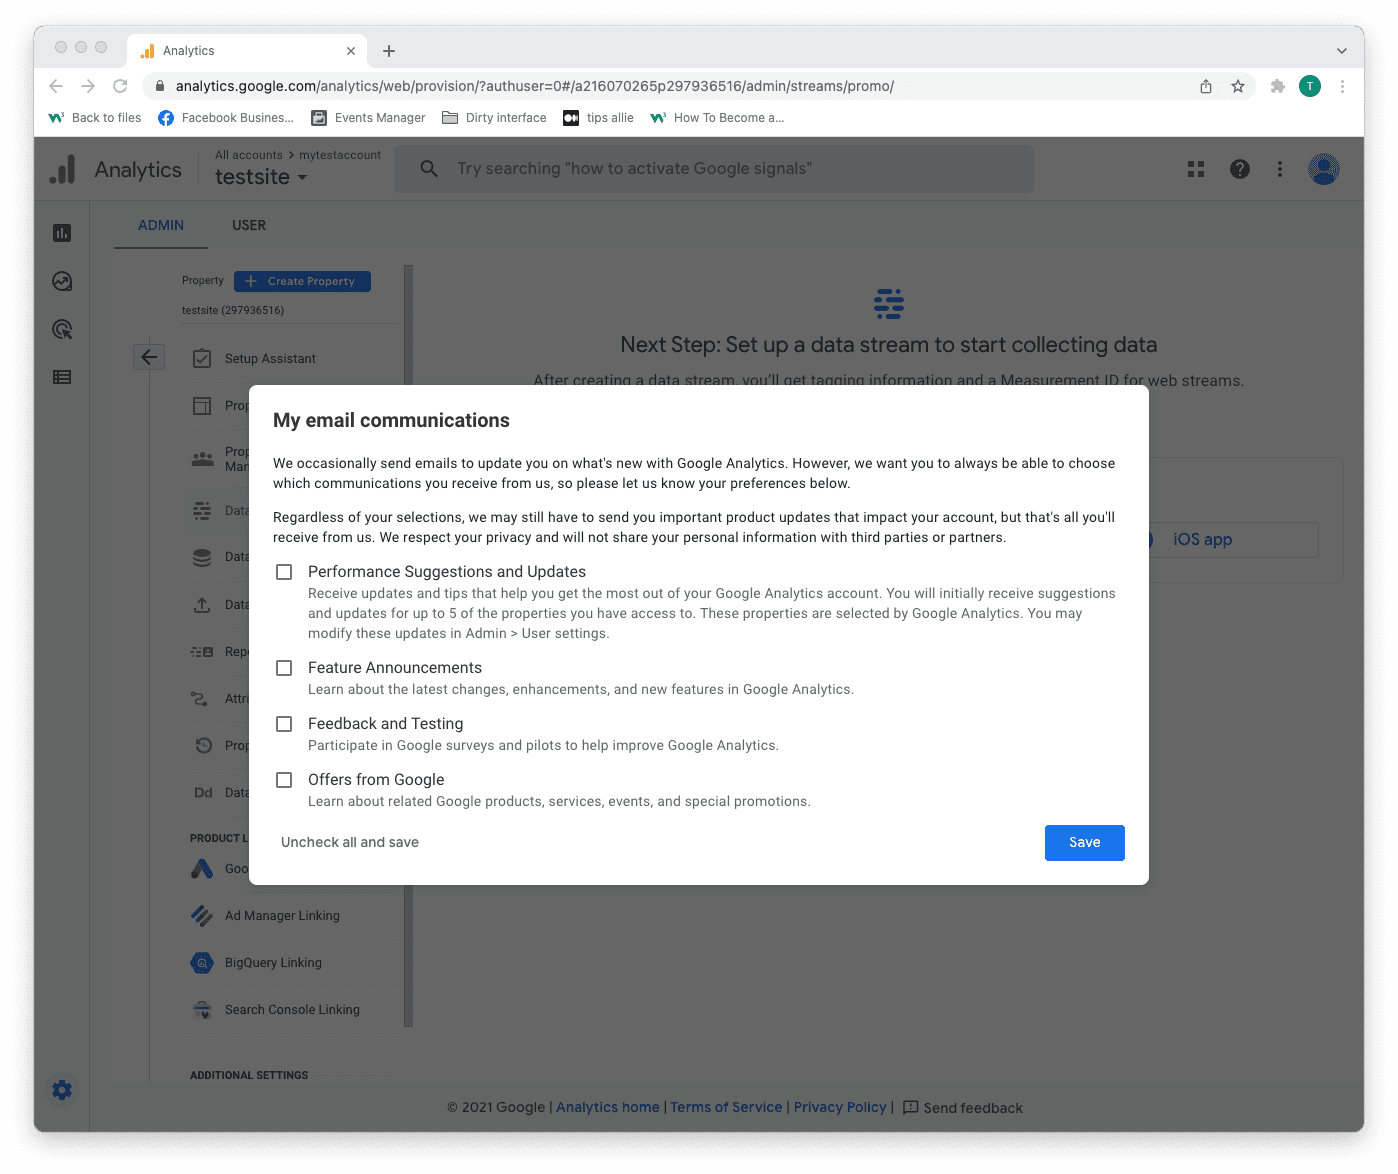
Step 7: Email subscriptions
- Tick or uncheck all boxes.
- Click the "Save" button to continue.
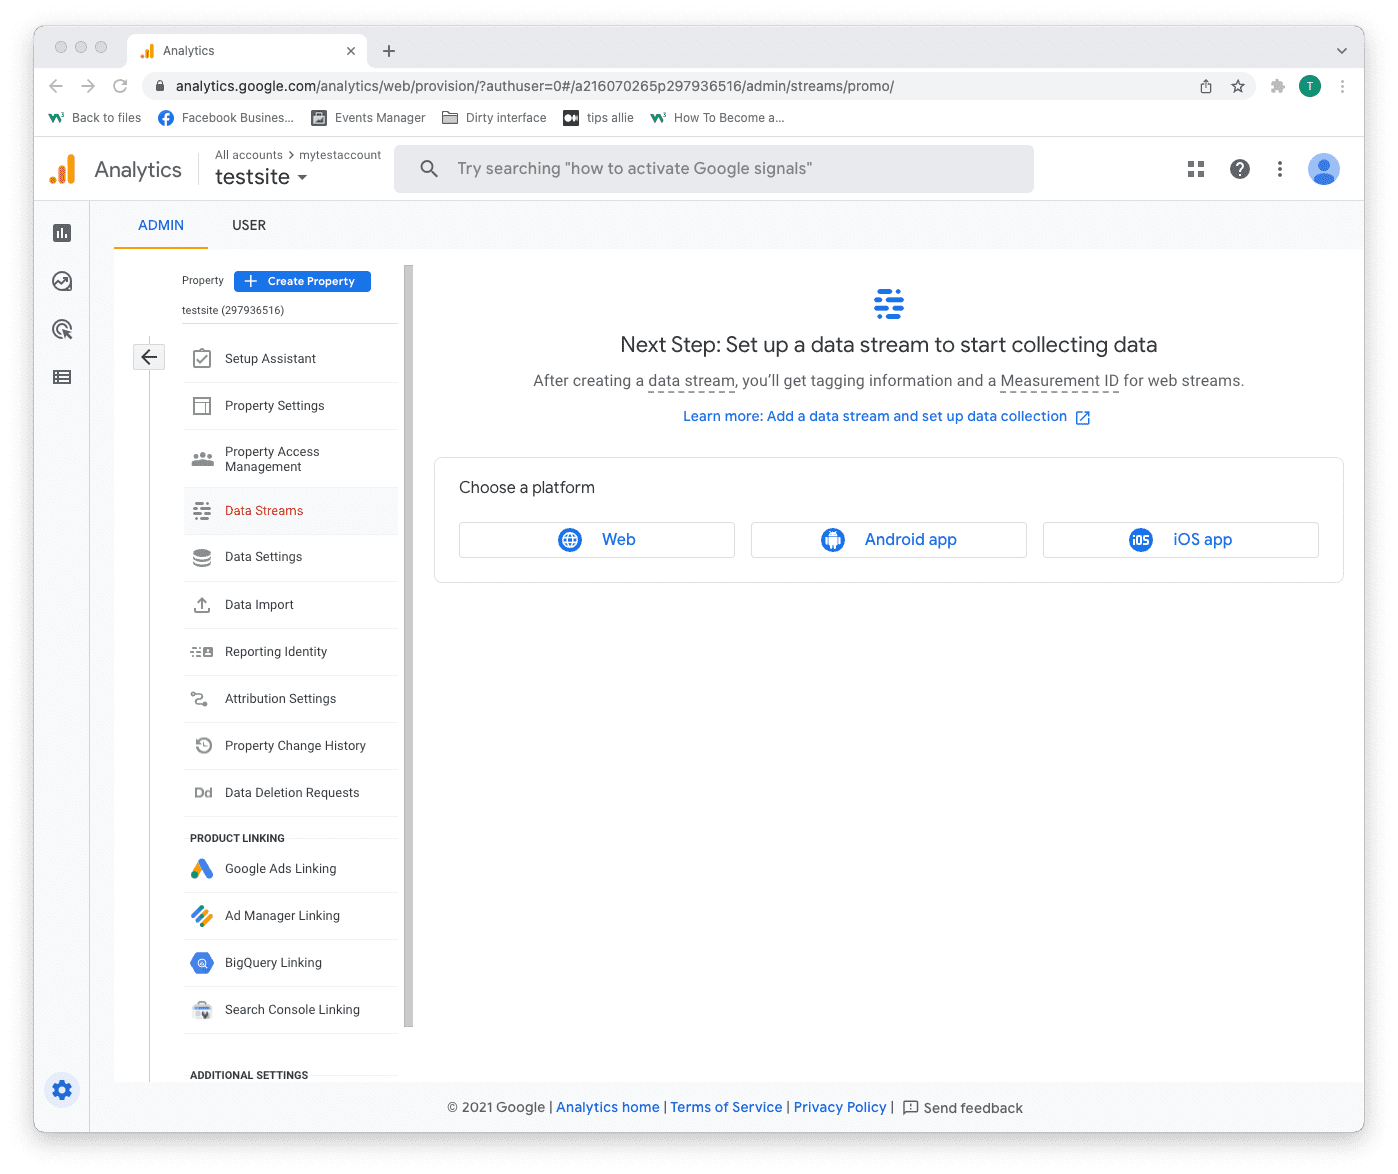
Step 8: Select platform
Chose the platform where you are collecting data.
Then, click the relevant platform to continue.
We are continuing with "Web" as the example in this tutorial.
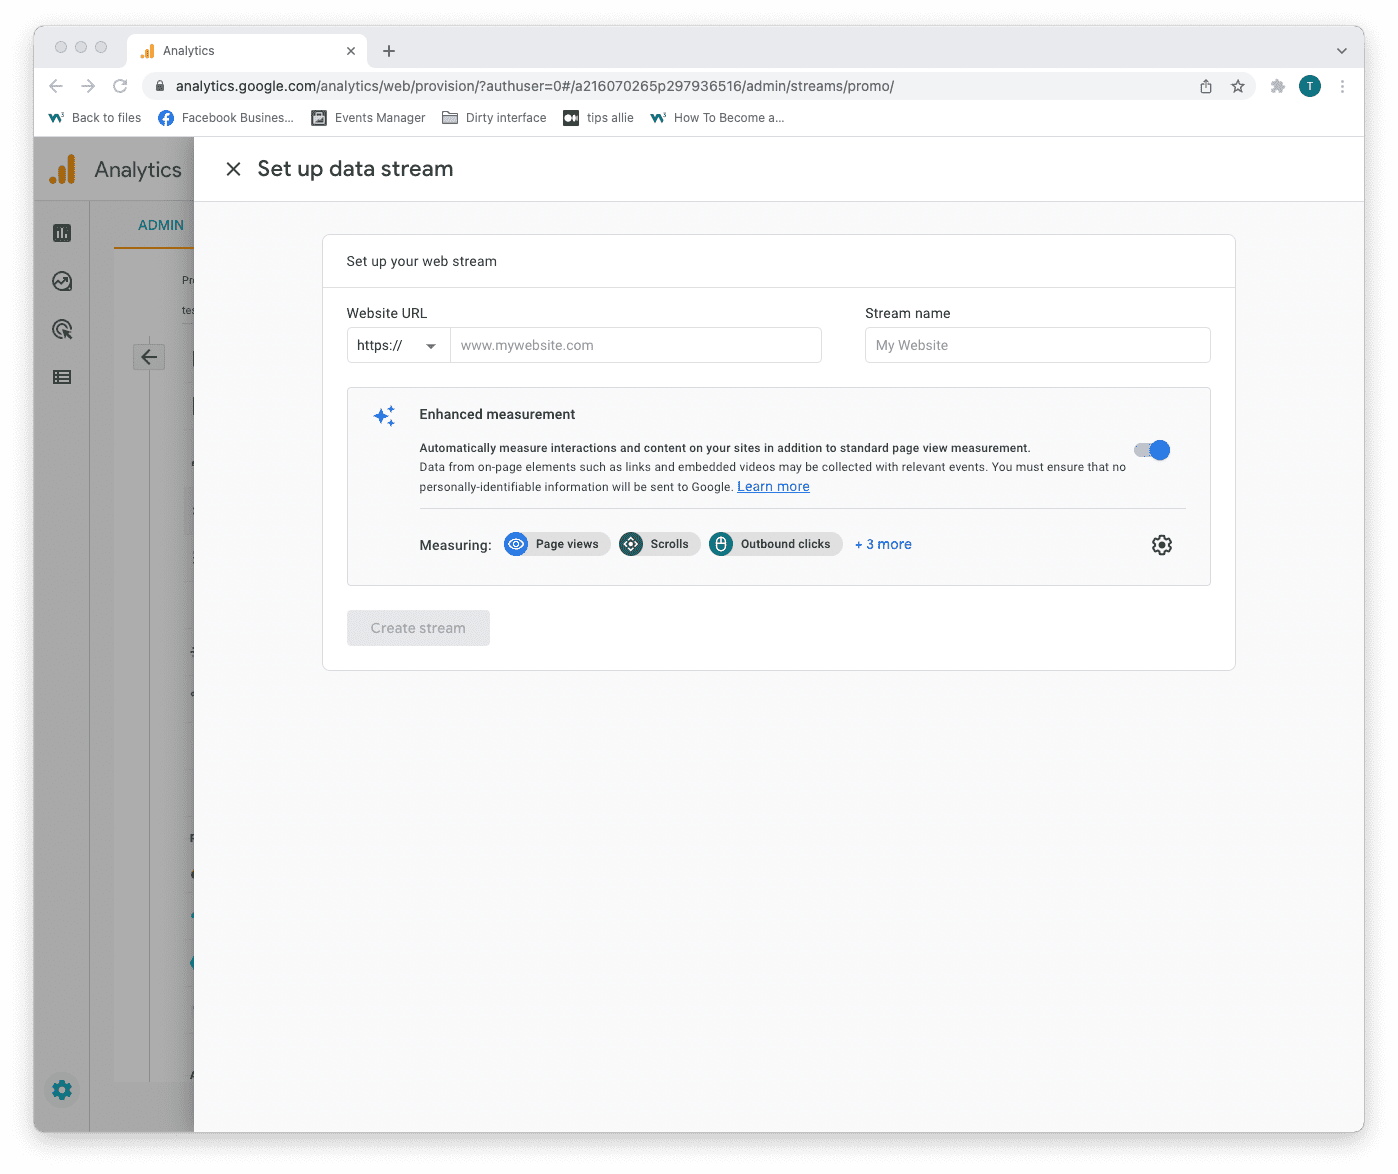
Step 9: Data stream setup
Enter data stream details.
- The URL to your site.
- The name that you want to give the stream.
- Decide if you are to enable enhanced measurement or not.
- Click on the "Create stream" button to continue.
The enhanced measurement can give the data more context. Improving your understanding of the traffic.
Step 10: Web stream overview
Here you can see a detailed overview of the web stream.
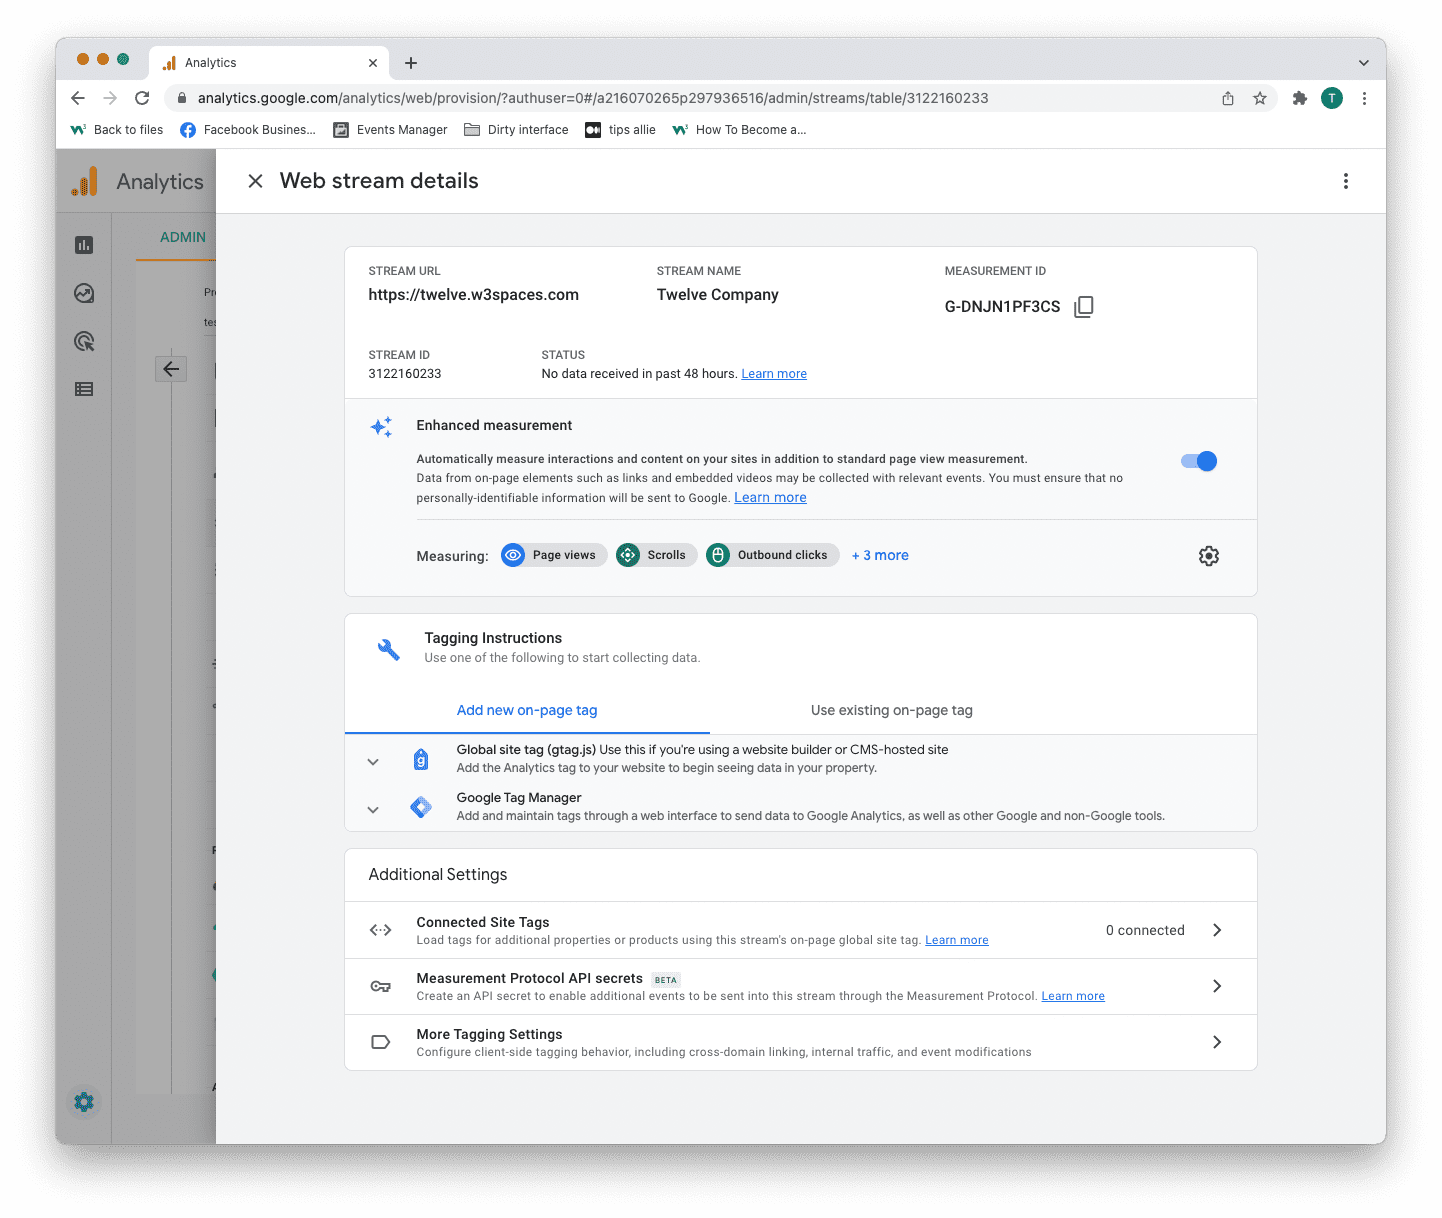
Here are the key takeaways from the overview.
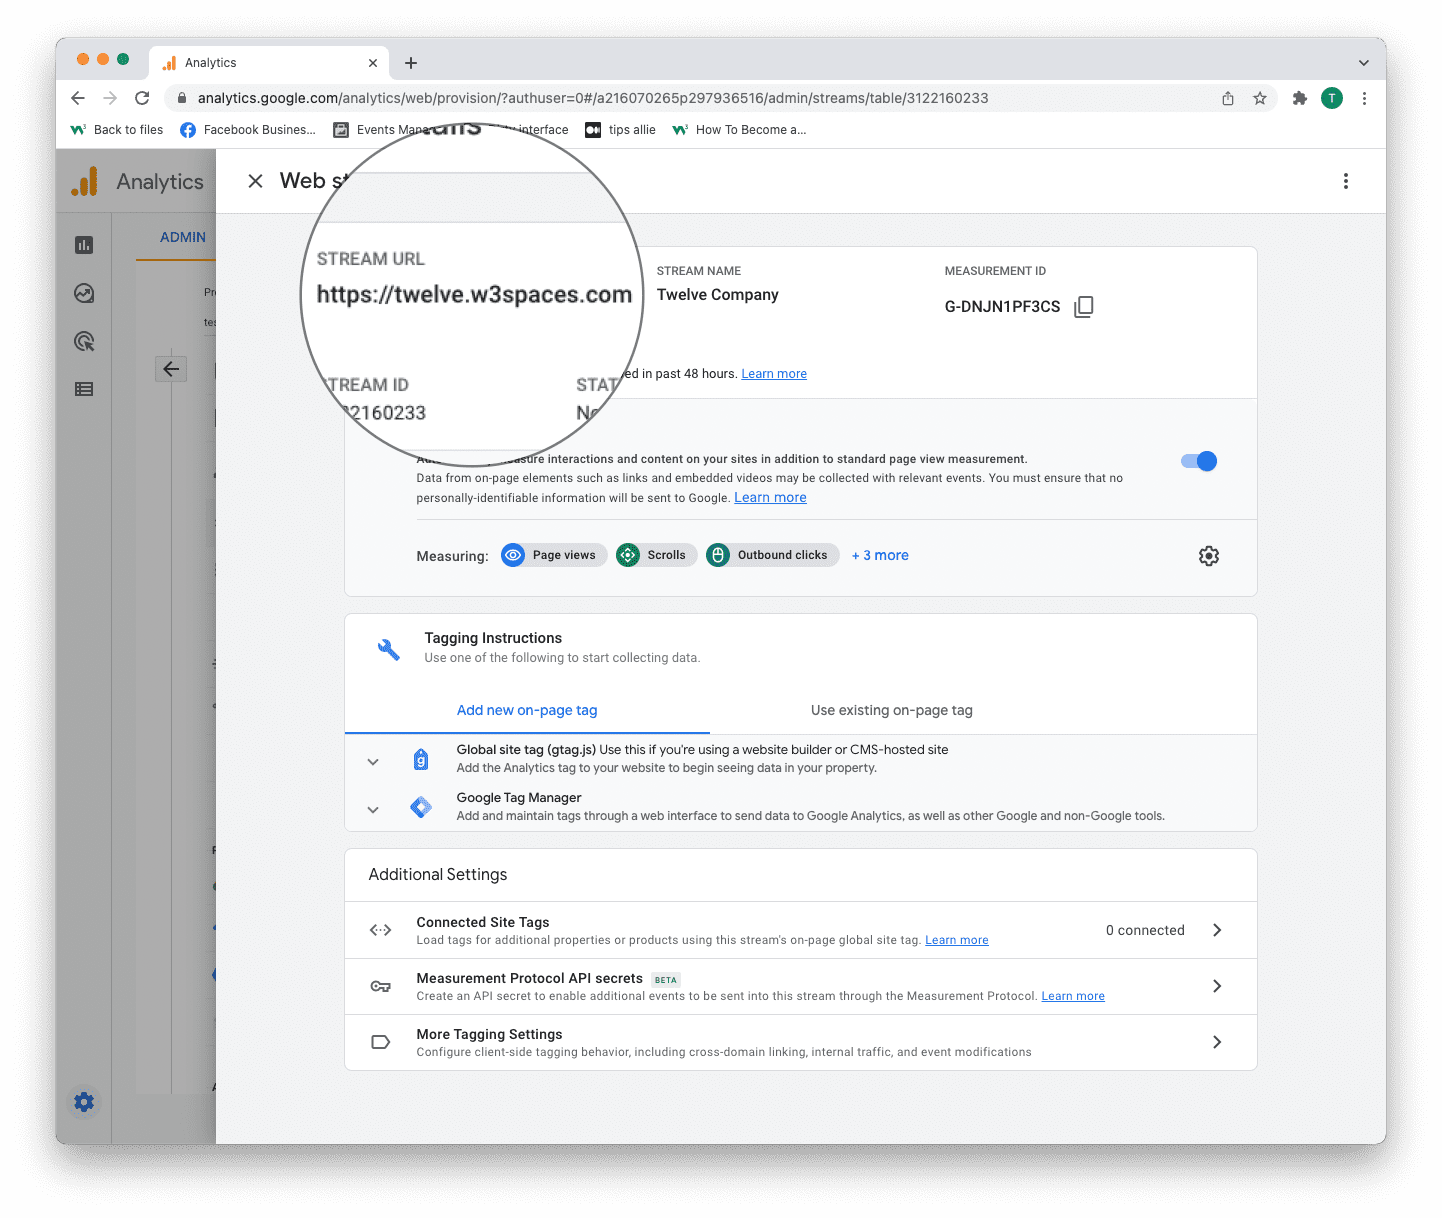
1. Stream URL.
The Stream URL is the link to the connected site.
2. Measurement ID
The Measurement ID is the identifier for your data stream.
It has a format of G-XXXXXXX.
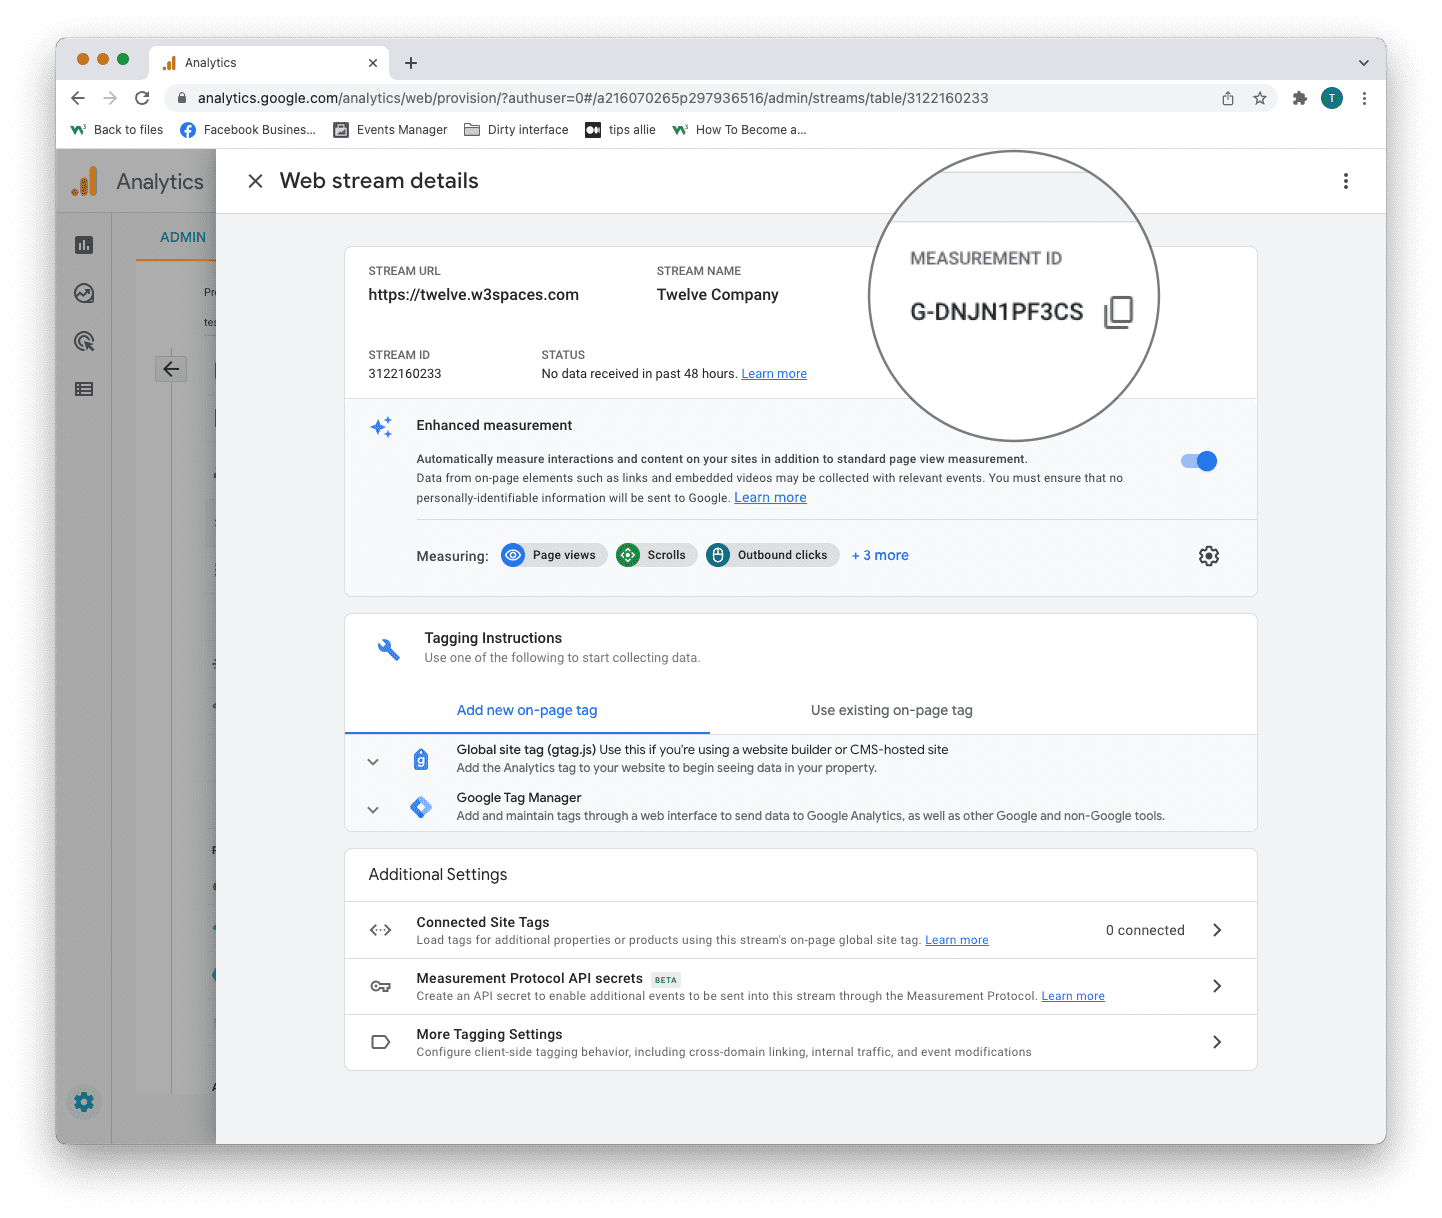
Google Analytics 4 uses Measurement ID. Older versions use Tracking ID. You can not have both.
3. Tagging instructions
Decide to use Global site tag (gtag.js) or Tag manager.
This tutorial will use the Global site tag.
Installing the Global site tag is the easiest and quickest way of getting it up and running.
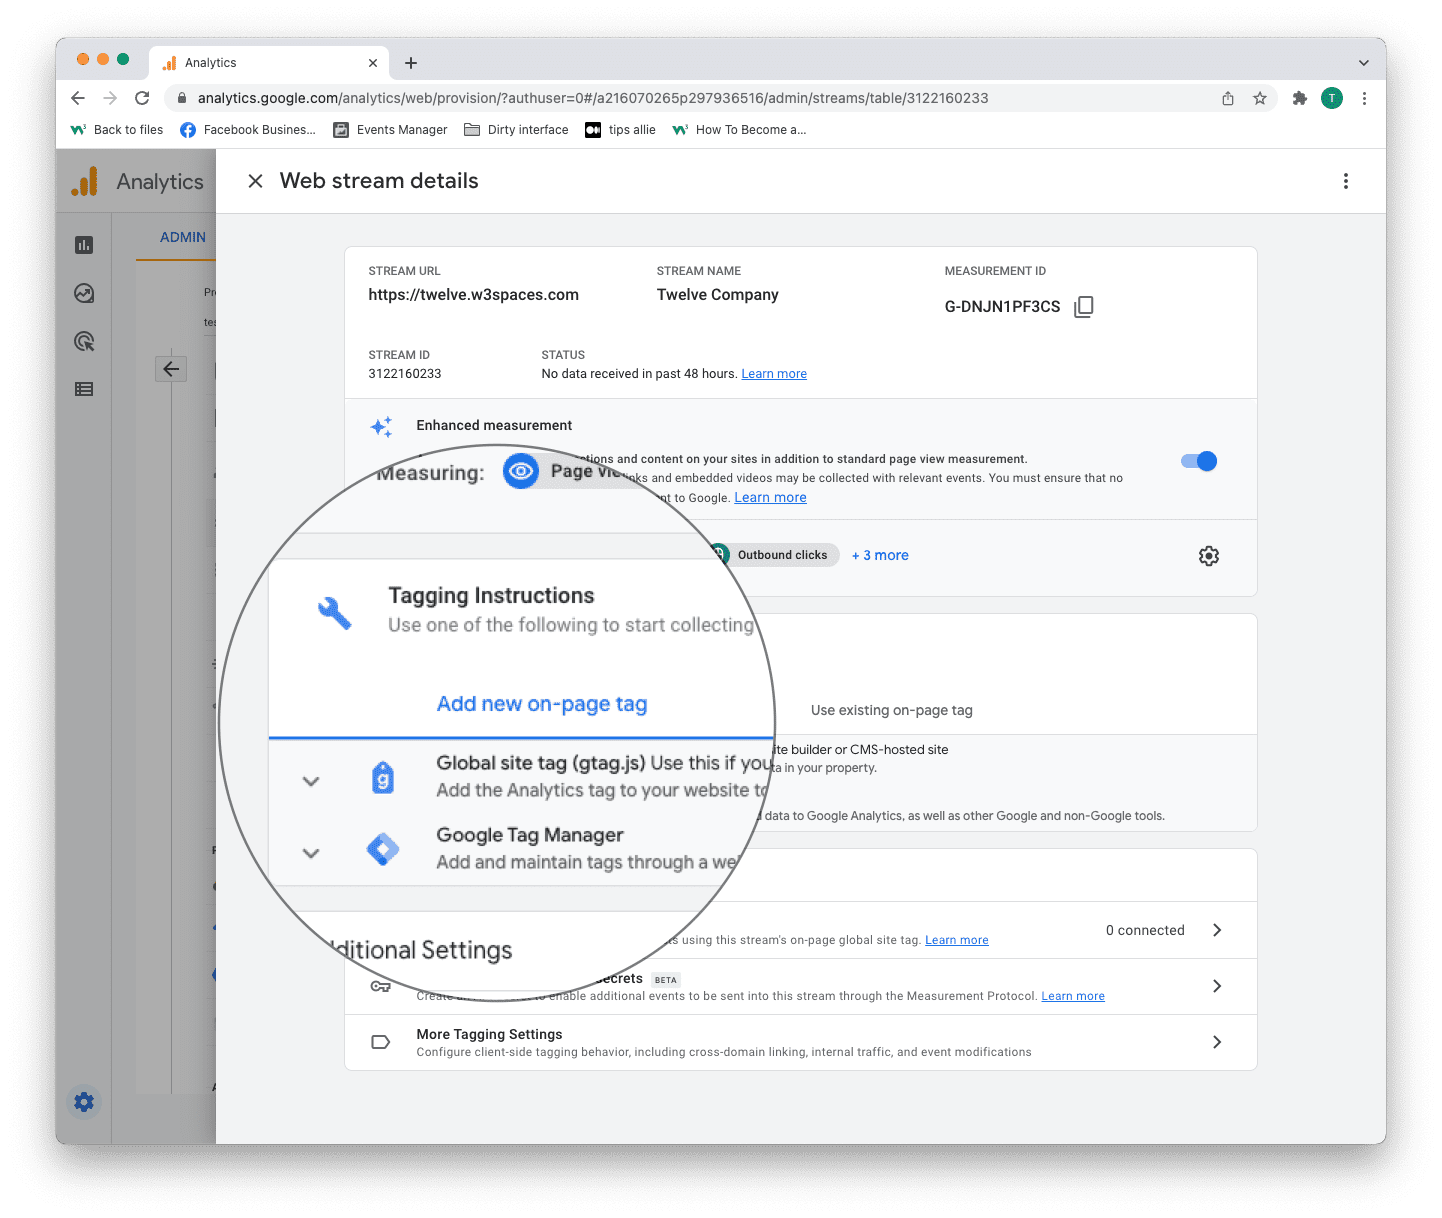
Step 11: Global site tag (gtag.js)
Click the "Global site tag (gtag.js)" row.
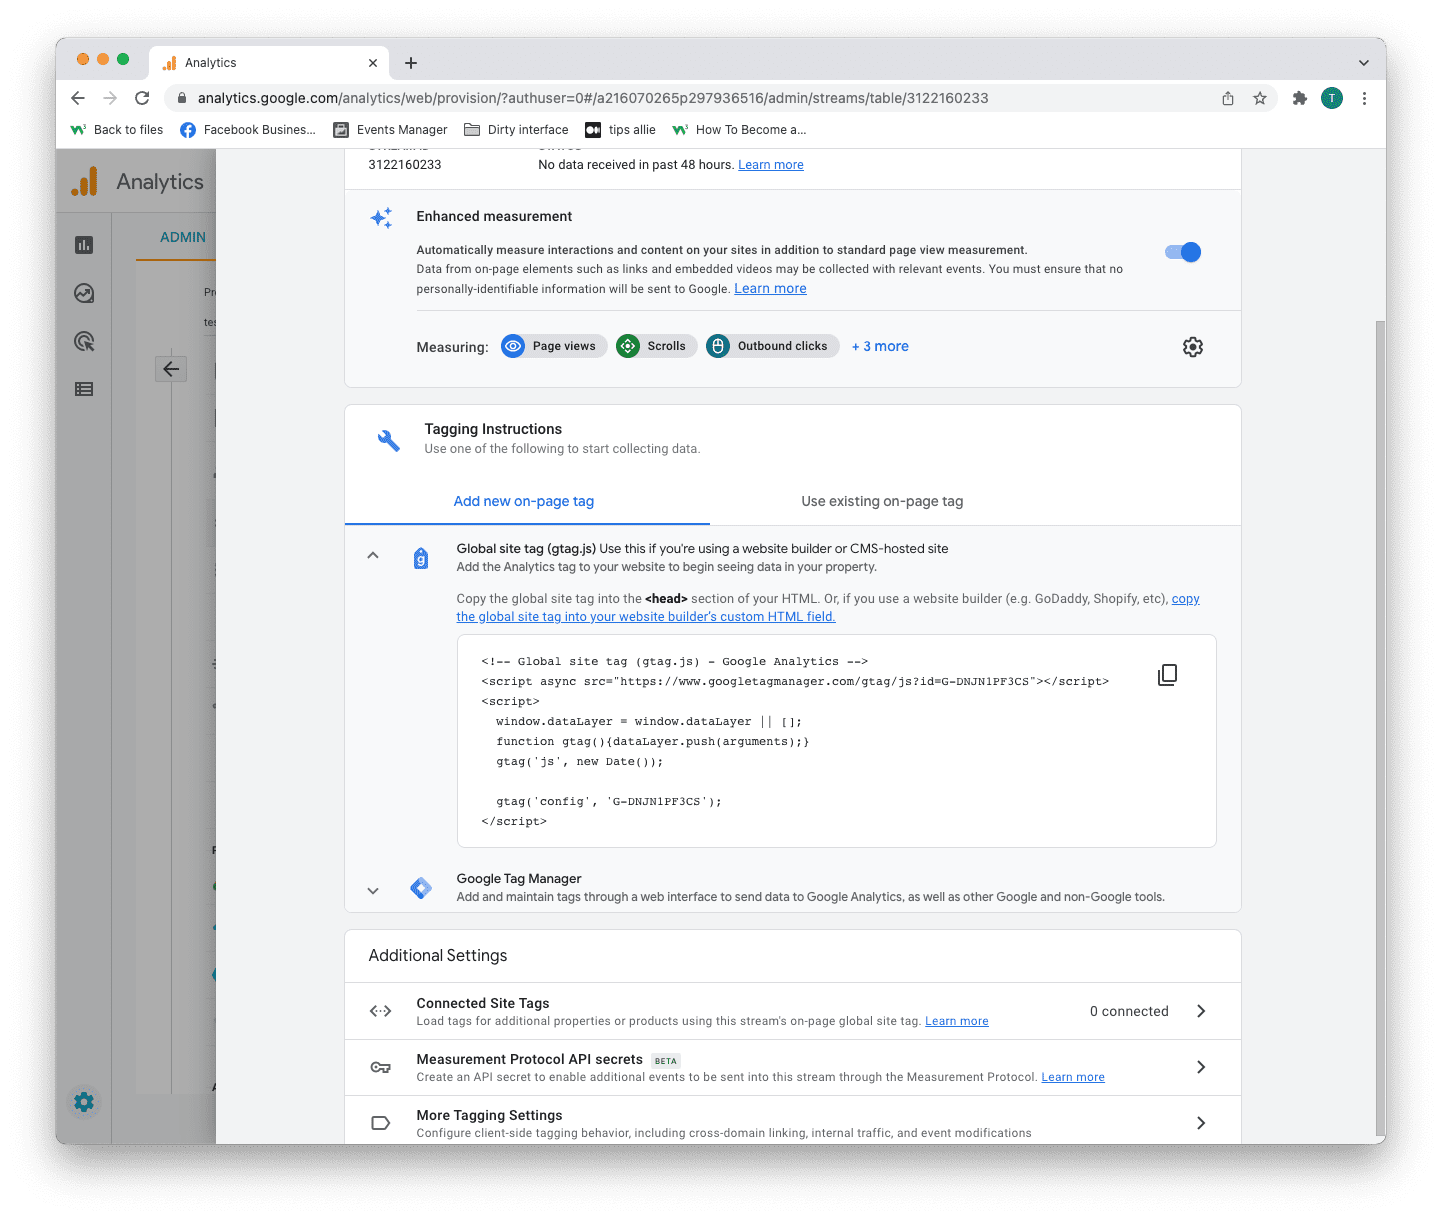
Here you can see a code snippet.
The code snippet is a script to allow Google to measure data on your site.
You can see the Measurement ID in the second last line in the code snippet.
The code snippet
<!-- Global site tag (gtag.js) - Google Analytics -->
<script async src="https://www.googletagmanager.com/gtag/js?id=G-DNJN1PF3CS"></script>
<script>
window.dataLayer = window.dataLayer || [];
function gtag(){dataLayer.push(arguments);}
gtag('js', new Date());
gtag('config', 'G-XXXXXXX');
</script>
Step 12: Enter the code snippet
Copy the code snippet.
Make sure to include your Measurement ID.
Locate the <head> tag in your HTML.
Paste the code snippet just below the <head> tag.
Save and publish the code.
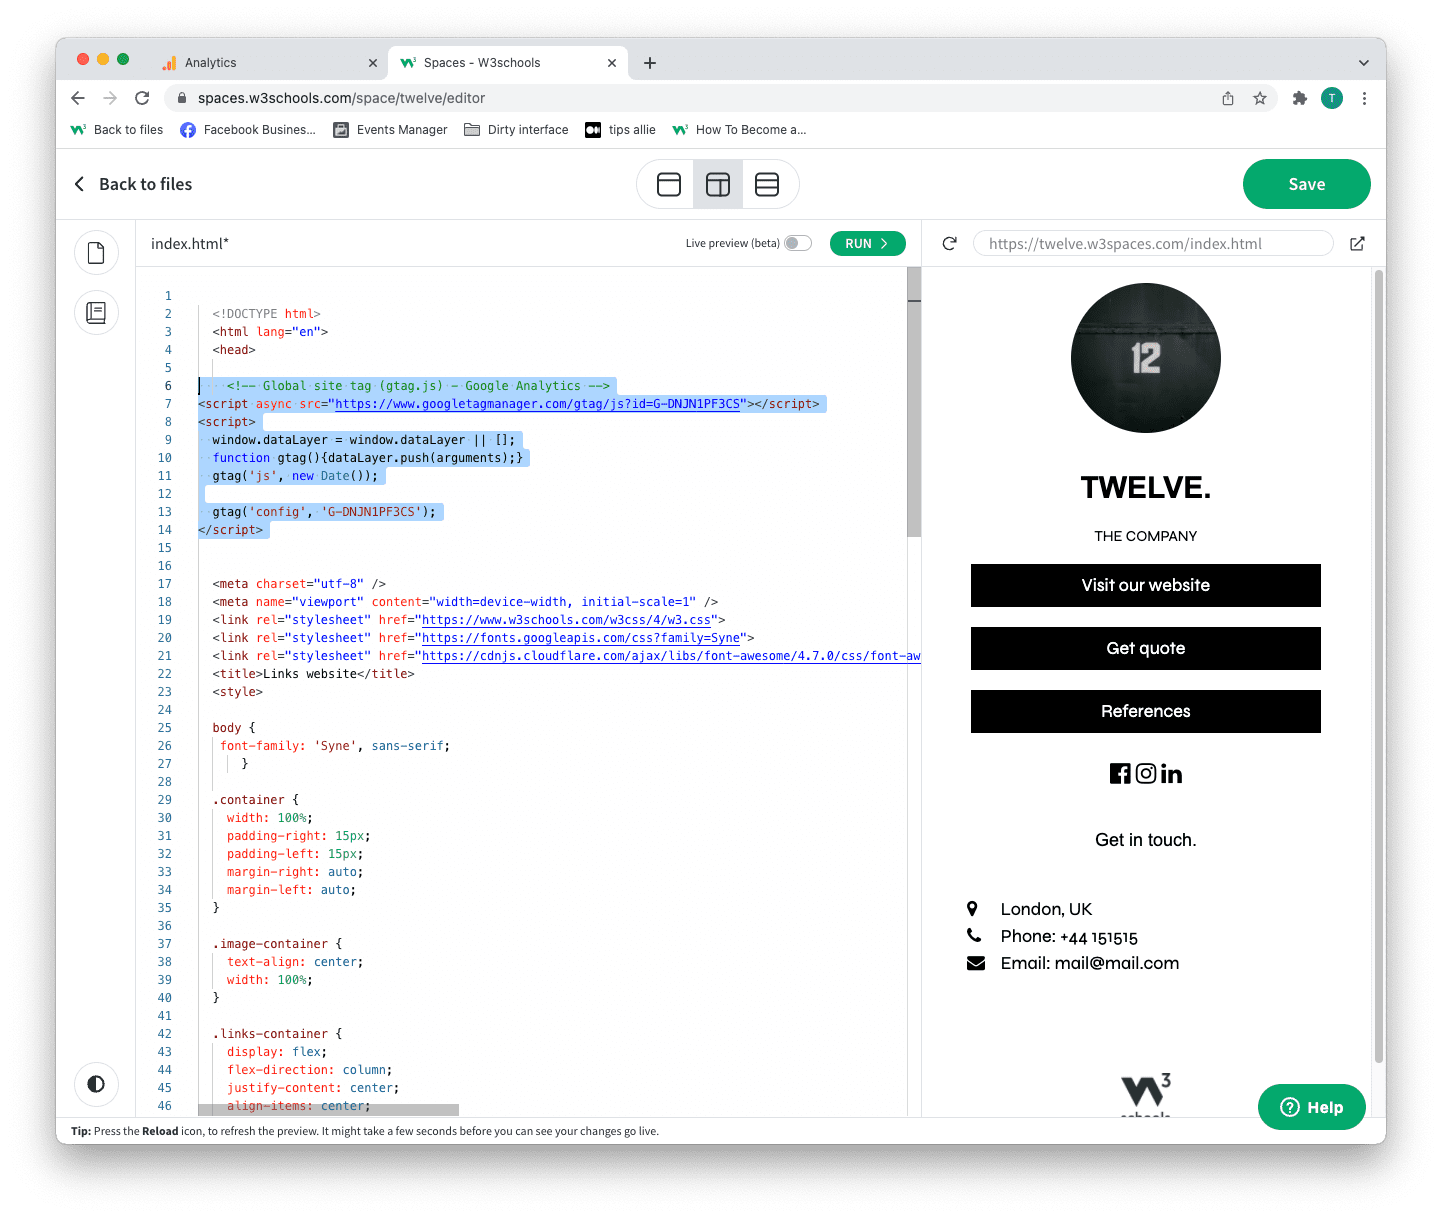
We used W3Schools Spaces in this example.
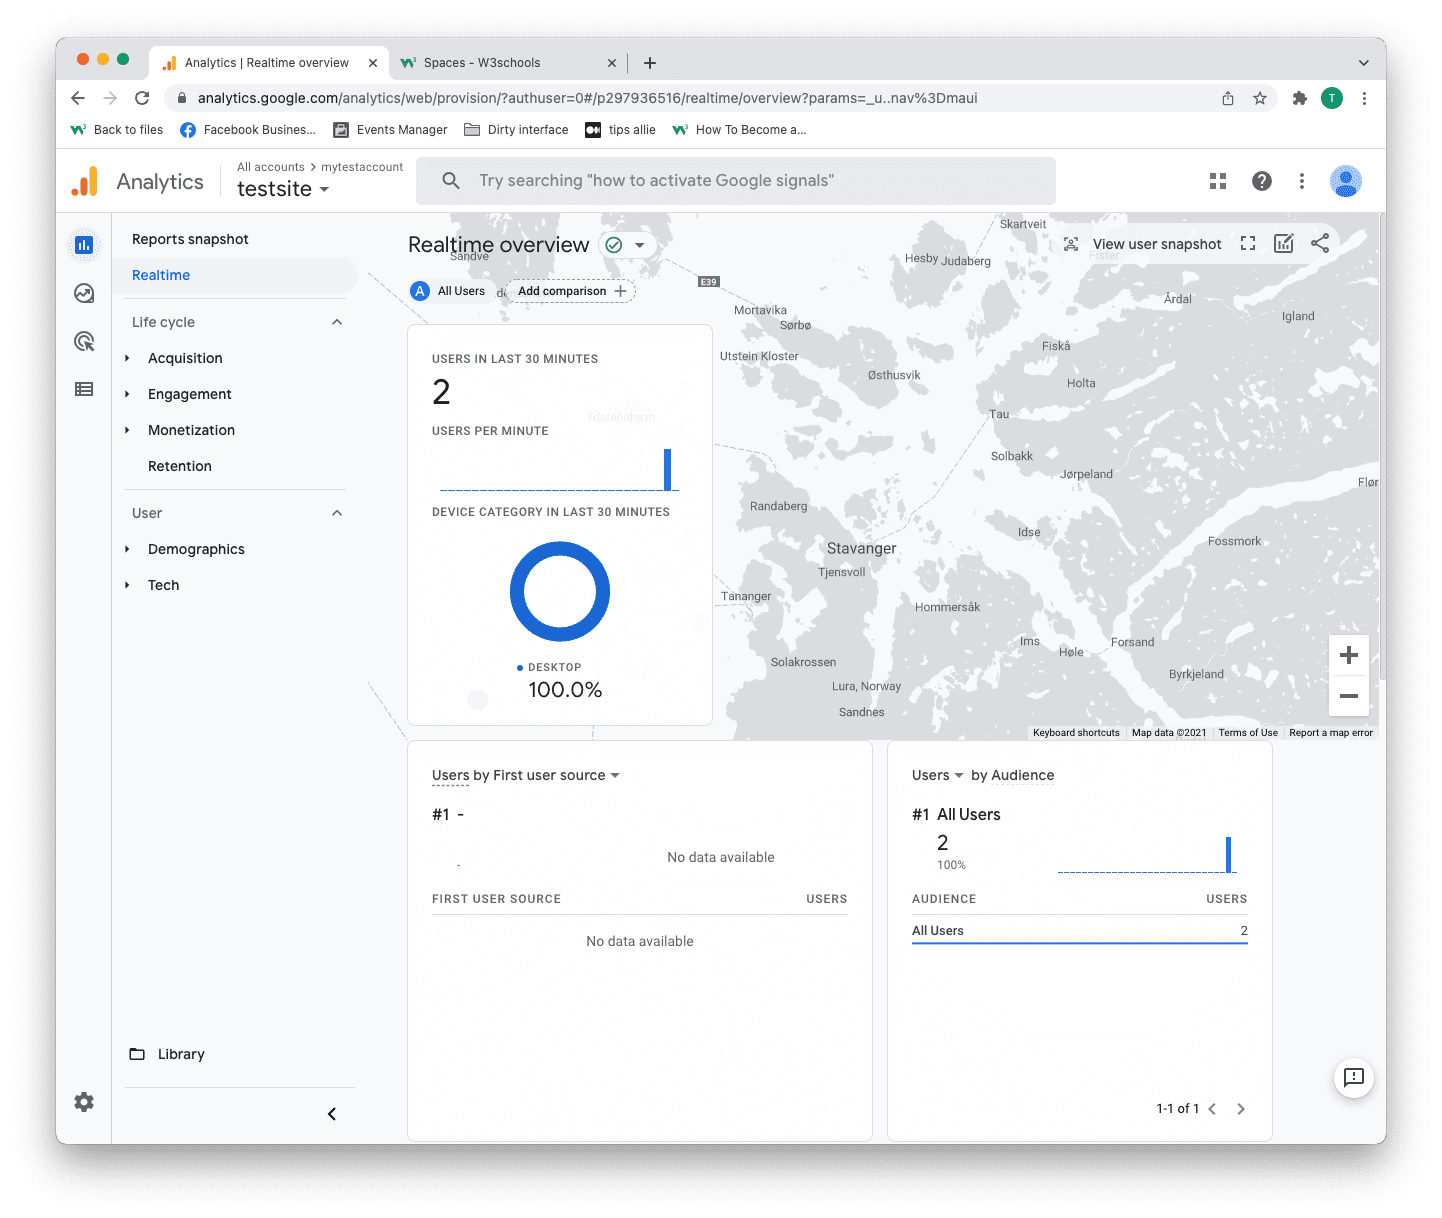
Step 13: Test that it works
Ensure that you have successfully saved and published the code snippet with the correct Measurement ID.
Open the URL for the site you have connected to the data stream.
Click on "Real time" on the menu to the left.
Confirm that you see yourself as an active user.
Congrats. You have successfully enabled Google Analytics for your site!
Explore Google Analytics
Recommended related topics are Tag manager and Events
Spend time in the service to learn about your user activity, commerce, demographics, device, and referrals.
Tip: Ever heard of W3Schools Spaces? It is a personal space where you can make a website from scratch or use a template and host it for free.
It has everything you need in the browser.
Get started in a few clicks.
Start now for free ❯* no credit card required